I recently bought a second ASUS ROG Strix 1080Ti OC to increase the training throughput of my deep learning rig. As I was benchmarking the GPUs for parallel training (results in my previous blog post), I noticed that the top GPU in my setup was running hot enough towards the end of the benchmarking to potentially start thermal throttling (84°C). Not only can this affect performance but it also can affect the longevity of the card. I knew this could potentially be an issue when I bought the card since my motherboard and case require the open-air cooled cards to be close to each other. However, I didn’t want to upgrade my motherboard or case if the thermal issues could be solved with better airflow.
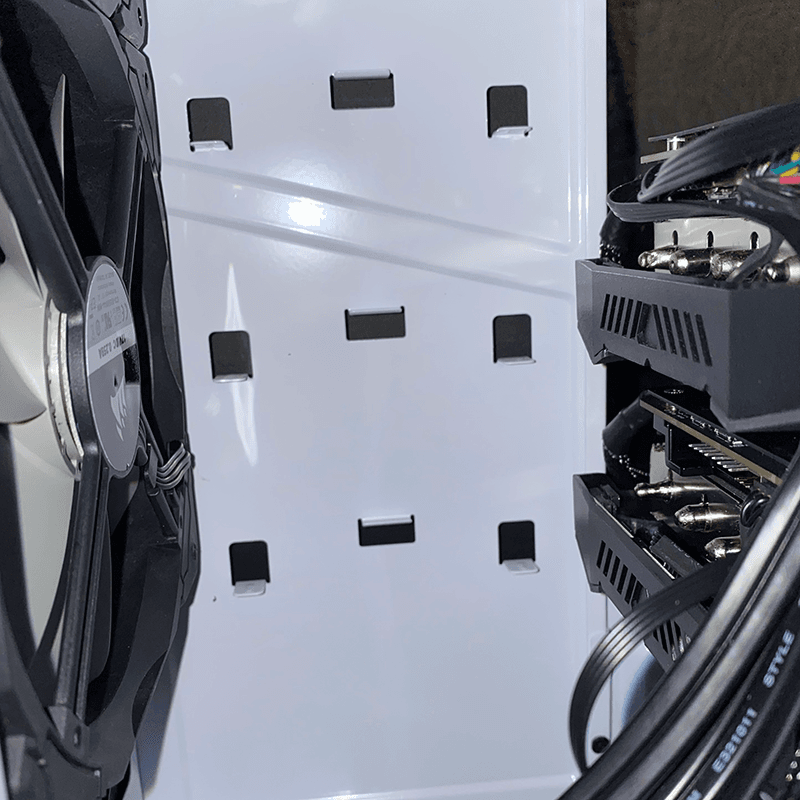
The first approach I took to increase the airflow to the GPUs was to upgrade the fans in my case. I have a NZXT H440 mid tower case that came with stock fans and a fan controller. I replaced the stock fans with Corsair 140ML fans and wired one of the intake fans in the front of the case and one of the outlet fans in the back of the case to the hotter top GPU. This allows the GPU to control the speed of those two fans. This setup is shown in the figure below.

I was hoping that this setup, with a fan controlled by the hot GPU aligned directly with the stacked GPUs, would provide enough additional airflow to keep the top card cool.
After setting up the new fans, I reran the parallel GPU training benchmarks and the thermal results were better but not as good as I was hoping. The top card was still reaching a peak temperature of about 80°C-82°C. I did some searching on various forums and the consensus seemed to be that the only thing that could remedy this problem is even better airflow. Since I have some rudimentary 3D design skills in Fusion 360, I decided to create a custom fan nozzle to direct all of the airflow from the one intake fan into the gap between the two GPU cards. It took a couple iterations but the design I ultimately landed on is shown in the viewer below.
If you would like to print this nozzle, the STL file can be downloaded here. Additionally, if you would like to add an STL visualization to your website, check out this repository. With the nozzle printed, I wanted to run a more thorough test.
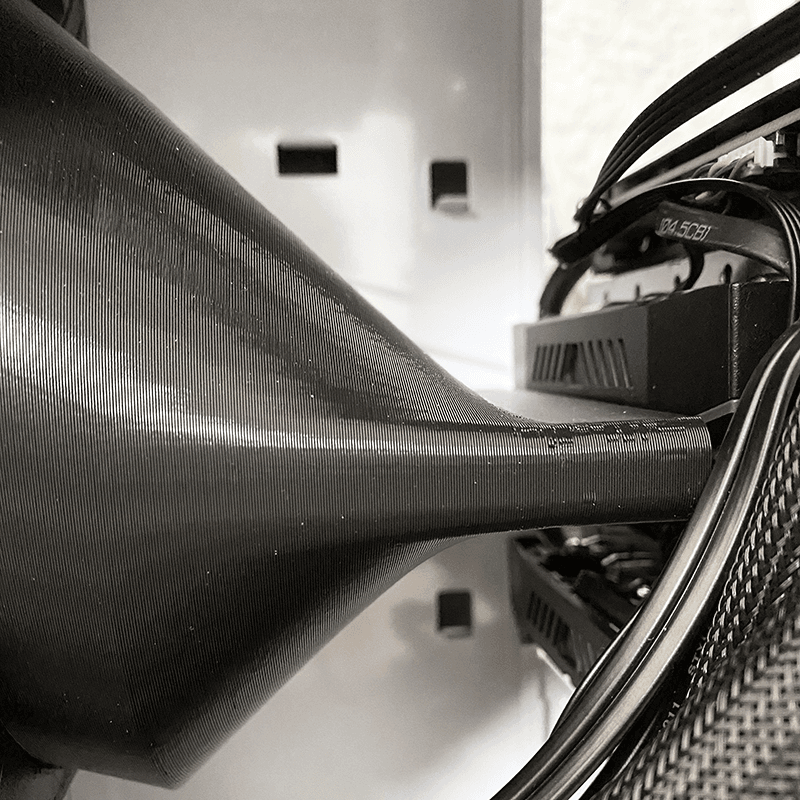
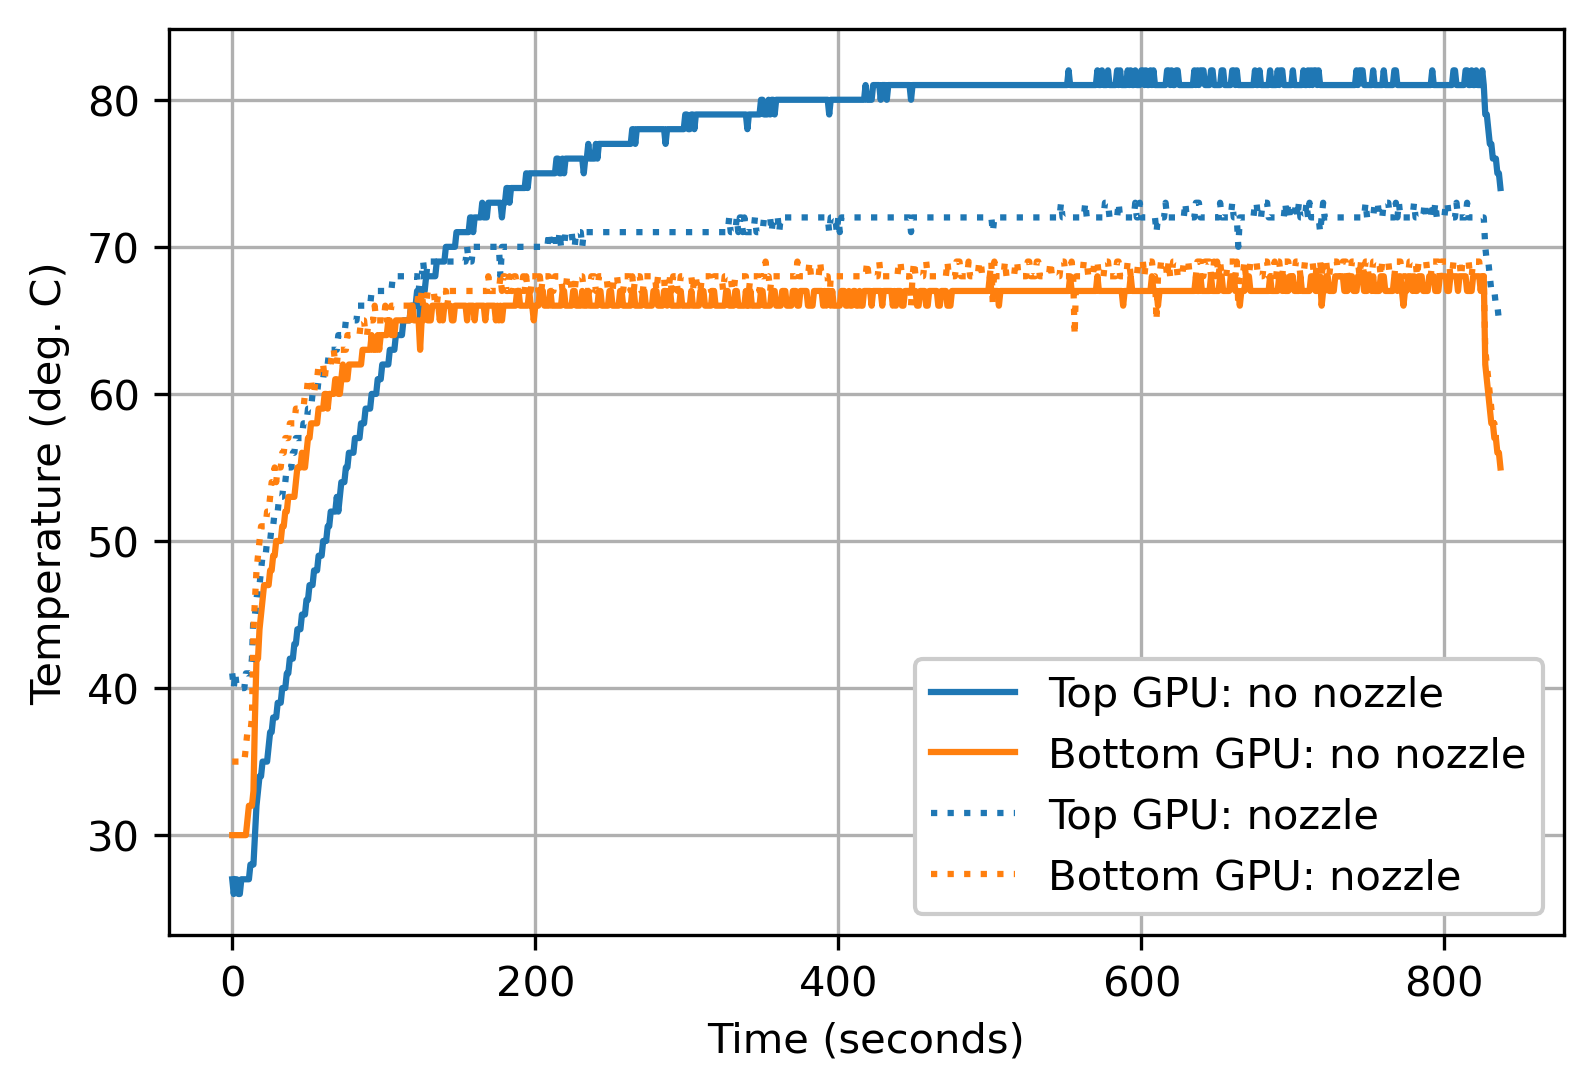
In parallel with running the deep learning benchmark, I also ran a Python script to log the temperatures of both GPUs over the course of the training. The benchmark that seemed to tax my setup the most was the ResNet50 training benchmark; so I modified the benchmark to run for 15 training epochs. This would create a good test for hitting peak GPU temperatures quickly. I first ran the test without the fan nozzle, with the GPUs starting from ambient temperatures. After the test, I quickly installed the fan nozzle and ran the test again. The installed nozzle is shown below, where it was designed to aim the air between the two cards.

By running the nozzle test second, this would disadvantage the nozzle results since the GPUs would not be starting from ambient temperatures. However, if the nozzle works well, it should still keep the peak temperatures from climbing as high. The results of the two tests are shown in the plot below.

It can been seen from the results above that using the nozzle reduces the peak temperature of the top GPU by almost 10°C. I am very pleased by how well the nozzle performs and thankful that I do not need to upgrade my case and/or motherboard to get better GPU thermals. I hope this exploration helps someone else who is struggling with heat in a dual open-air cooled GPU setup.